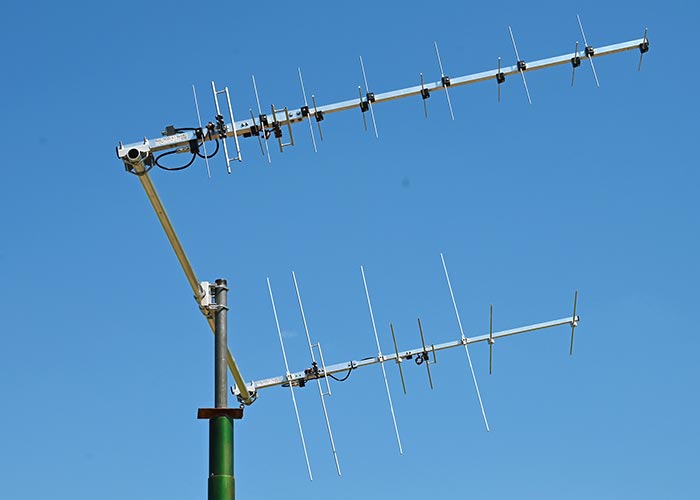
Setting up and using an antenna for ham radio is a fundamental skill for any amateur radio operator. A well-installed antenna can significantly enhance your communication capabilities, allowing you to transmit and receive signals over greater distances with better clarity. This guide will walk you through the essential steps of selecting, setting up, and using an antenna for your ham radio operations.
1. Understanding Antenna Basics
Before diving into the setup process, it’s important to understand some basic concepts about antennas:
- Frequency Bands: Ham radio operates on various frequency bands, each with its own characteristics. Common bands include HF (high frequency), VHF (very high frequency), and UHF (ultra-high frequency). The type of antenna you need depends on the band(s) you plan to operate on.
- Types of Antennas: There are several types of antennas, including dipole antennas, vertical antennas, Yagi antennas, and loop antennas. Each type has its own advantages and is suited for different applications.
- Antenna Gain and Radiation Pattern: Antenna gain measures how well an antenna can direct radio energy in a specific direction, while the radiation pattern describes the distribution of that energy. Higher gain antennas can focus signals more effectively, but may require more precise alignment.
2. Selecting the Right Antenna
Choosing the right antenna depends on your operating goals and constraints. Here are some factors to consider:
- Space Availability: If you have limited space, a compact vertical antenna or a small loop antenna might be the best choice. For larger properties, a dipole or Yagi antenna could be suitable.
- Budget: Antennas range in price from inexpensive wire dipoles to more costly multi-element Yagi antennas. Determine your budget and select an antenna that meets your needs without breaking the bank.
- Operating Bands: Ensure that the antenna you choose covers the frequency bands you intend to use. Some antennas are designed for multi-band operation, while others are optimized for a single band.

3. Gathering Necessary Equipment
To set up your antenna, you’ll need the following equipment:
- Antenna: The actual antenna you’ll be using (e.g., dipole, vertical, Yagi).
- Coaxial Cable: This cable connects your radio to the antenna. RG-8, RG-58, and RG-213 are common types.
- Connectors: Ensure you have the appropriate connectors (e.g., PL-259) for your radio and antenna.
- Antenna Tuner: An antenna tuner helps match the impedance of the antenna to your radio, improving performance.
- Support Structures: Masts, poles, or trees to mount and support the antenna.
- Tools: Basic tools like a soldering iron, wire cutters, and pliers for assembly and installation.
4. Installing the Antenna
Once you have your equipment ready, follow these steps to install your antenna:
a. Location and Safety
- Choose a Suitable Location: Find an open area away from obstructions like buildings and trees. Higher locations are generally better for antennas.
- Safety First: Ensure the installation area is free from power lines and other hazards. Use proper safety gear, such as gloves and helmets, if working at heights.
b. Assembling the Antenna
- Read the Manual: Follow the manufacturer’s instructions for assembling the antenna. Each type of antenna has specific assembly requirements.
- Check Connections: Ensure all connections are secure and properly soldered or crimped to prevent signal loss.
c. Mounting the Antenna
- Vertical Antennas: Mount the antenna on a mast or pole, ensuring it is vertical and well-grounded to protect against lightning.
- Dipole Antennas: Stretch the antenna horizontally between two support points, such as trees or poles. Ensure the center of the dipole is elevated to improve performance.
- Yagi Antennas: Mount the Yagi antenna on a rotator if possible, allowing you to aim it in different directions for better signal reception.
5. Connecting to Your Radio
- Run Coaxial Cable: Connect one end of the coaxial cable to the antenna and the other end to your radio. Ensure the connections are tight and weatherproofed if exposed to the elements.
- Use an Antenna Tuner: Connect the antenna tuner between your radio and the antenna. This device helps match the antenna’s impedance to your radio, optimizing performance.
6. Testing and Adjusting the Antenna
Before using your antenna for communication, it’s important to test and make any necessary adjustments:
- SWR Meter: Use a Standing Wave Ratio (SWR) meter to measure the efficiency of your antenna setup. An SWR of 1:1 is ideal, but anything below 2:1 is generally acceptable.
- Adjustments: If the SWR is too high, adjust the antenna length or position. For dipole antennas, adjusting the length of each leg can help fine-tune the SWR.
7. Operating Your Ham Radio

With your antenna installed and tested, you’re ready to start operating:
- Tune Your Radio: Use the antenna tuner to match the radio to the antenna before transmitting.
- Start Listening: Begin by listening to various frequencies to understand the conditions and activity on the bands.
- Make Contacts: When you’re ready, start making contacts with other ham radio operators. Follow proper operating procedures and etiquette.
8. Maintenance and Troubleshooting
Regular maintenance is key to keeping your antenna system in good working order:
- Inspect Regularly: Check for signs of wear, corrosion, or damage to the antenna, coaxial cable, and connectors.
- Weatherproofing: Ensure all outdoor connections are weatherproofed to prevent moisture from causing problems.
- Monitor Performance: Keep an eye on your SWR readings and overall performance. If you notice a drop in signal quality, inspect the system for issues.
Conclusion
Setting up and using an antenna for ham radio is a rewarding process that enhances your ability to communicate over long distances. By understanding the basics of antennas, selecting the right one for your needs, and following proper installation and maintenance practices, you can ensure optimal performance from your ham radio setup. Whether you’re a beginner or an experienced operator, investing time and effort into your antenna system will pay off with clearer signals and more reliable communication.

